© 2026 InterSystems Corporation, Cambridge, MA. All rights reserved.Privacy & TermsGuaranteeSection 508Contest Terms

fhir-orga-dt  Works
Works
Works

4.5
1 reviews
0
Awards
703
Views
0
IPM installs
 0
0 1
1
Details
Releases (1)
Reviews (1)
Issues
Articles (1)
This is a simple full python IRIS production that gather information from a csv, use a DataTransformation to make it into a FHIR object and then, save that information to a FHIR server.
What's new in this version
Initial Release
1. Fhir-orga-dt
This is a simple full python IRIS production that gather information from a csv, use a DataTransformation to make it into a FHIR object and then, save that information to a FHIR server.
- 1. Fhir-orga-dt
- 2. Prerequisites
- 3. Installation
- 4. FHIR server
- 5. Walkthrough
- 6. Creation of a new DataTransformation
- 7. What’s inside the repo
2. Prerequisites
Make sure you have git and Docker desktop installed.
If you work inside the container, as seen in 3.3., you don’t need to install fhirpy and fhir.resources.
If you are not inside the container, you can use pip to install fhirpy and fhir.resources.
Check fhirpy and fhir.resources for morte information.
3. Installation
3.1. Installation for development
Clone/git pull the repo into any local directory e.g. like it is shown below:
git clone https://github.com/LucasEnard/fhir-client-python.git
Open the terminal in this directory and run:
docker build .
3.2. Management Portal and VSCode
This repository is ready for VS Code.
Open the locally-cloned fhir-client-python folder in VS Code.
If prompted (bottom right corner), install the recommended extensions.
3.3. Having the folder open inside the container
You can be inside the container before coding if you wish.
For this, docker must be on before opening VSCode.
Then, inside VSCode, when prompted (in the right bottom corner), reopen the folder inside the container so you will be able to use the python components within it.
The first time you do this it may take several minutes while the container is readied.
If you don’t have this option, you can click in the bottom left corner and press reopen in container then select From Dockerfile

By opening the folder remote you enable VS Code and any terminals you open within it to use the python components within the container.
4. FHIR server
To complete this walktrough we will use a fhir server.
This fhir server was already build-in when you cloned and build the container.
The url is localhost:52773/fhir/r4
5. Walkthrough
Complete walkthrough of the Python IRIS production.
5.1. Messages and objects
Objects and messages will hold the information between our services,processes and opeartions.
In the obj.py file we have to create a dataclass that match the csv, this will be used to hold the information before doing the DataTransformation.
In our example the organization.csv csv looks like this,
active;name;city;country;system;value
true;Name1;city1;country1;phone;050678504
false;Name2;city2;country2;phone;123456789
Therefore, the object will look like this,
@dataclass
# > This class represents a simple organization
class BaseOrganization:
    active:bool = None
    name:str = None
    city:str = None
    country:str = None
    system:str = None
    value:str = None
In the msg.py file, we will have two type of request, the first one hold information of an organization before the DataTransformation and the second one can hold the information of the organization after the DataTransformation.
5.2. Business Service
In the bs.py file we have the code that allows us to read the csv and for each row of the csv ( so for each organization ), map it into an object we created earlier.
Then, for each of those row ( organization ) we create a request and send it to our process to do the DataTransformation.
# We open the file
with open(self.path + self.filename,encoding="utf-8") as csv:
    # We read it and map it using the object BaseOrganization from earlier
    reader = DataclassReader(csv, self.fhir_type ,delimiter=";")
    # For each of those organization, we can create a request and send it to the process
    for row in reader:
        msg = OrgaRequest()
        msg.organization = row
        self.send_request_sync('Python.ProcessCSV',msg)
5.3. Business Process
In the bp.py file we have the DataTransformation, converting a simple python object holding little information to a FHIR R4 object.
Here are the steps to do a DataTransformation using embedded python on our simple organization,
# Creation of the object Organization organization = Organization()Mapping of the information from the request to the Organization object
organization.name = base_orga.name
organization.active = base_orga.active
Creation of the Address object and mapping of the information
from the request to the Address object
adress = Address() adress.country = base_orga.country adress.city = base_orga.city
Setting the adress of our organization to the one we created
organization.address = [adress]
Creation of the ContactPoint object and mapping of the
information from the request to the ContactPoint object
telecom = ContactPoint() telecom.value = base_orga.value telecom.system = base_orga.system
Setting the telecom of our organization to the one we created
organization.telecom = [telecom]
Now, our DT is done, we have an object organization that is a
FHIR R4 object and holds all of our csv information.
After that, our mapping is done and our DT is working.
Now, we can send this newly created FHIR R4 resource to our FhirClient that is our operation.
5.4. Business Operation
In the bo.py file we have the FhirClient, this client creates a connection to a fhir server that will hold the information gathered through the csv.
In this example, we use a local fhir server who doesn’t need an api key to connect.
To connect to it we have to use in the on_init function,
if not hasattr(self,'url'):
    self.url = 'localhost:52773/fhir/r4'
self.client = SyncFHIRClient(url=self.url)
Now, when we receive a message/request, we can, by finding the resource type of the resource we send with our request to the client, create an object readable by the client, and then save it to the fhir server.
# Get the resource type from the request ( here "Organization" ) resource_type = request.resource["resource_type"]Create a resource of this type using the request's data
resource = construct_fhir_element(resource_type, request.resource)
Save the resource to the FHIR server using the client
self.client.resource(resource_type,**json.loads(resource.json())).save()
It is to be noted that the fhir client works with any resource from FHIR R4 and to use and change our example, we only need to change the DataTransformation and the object the holds the csv information.
5.5. Conclusion of the walkthrough
If you have followed this walkthrough you now know exactly how to read a csv of a represetation of a FHIR R4 resource, use a DataTransformation to make it into a real FHIR R4 object and save it to a server.
6. Creation of a new DataTransformation
This repository is ready to code in VSCode with InterSystems plugins.
Open /src/python to start coding or using the autocompletion.
Steps to create a new transformation
To add a new transformation and use it, the only things you need to do is add your csv named Patient.csv ( for example ) in the src/python/csv folder.
Then, create an object in src/python/obj.py called BasePatient that map your csv.
Now create a request in src/python/msg.py called PatientRequest that has a variable resource typed BasePatient.
The final step is the DataTransformation, for this, go to src/python/bp.py and add your DT. First add if isinstance(request, PatientRequest): and then map your request resource to a fhir.resource Patient.
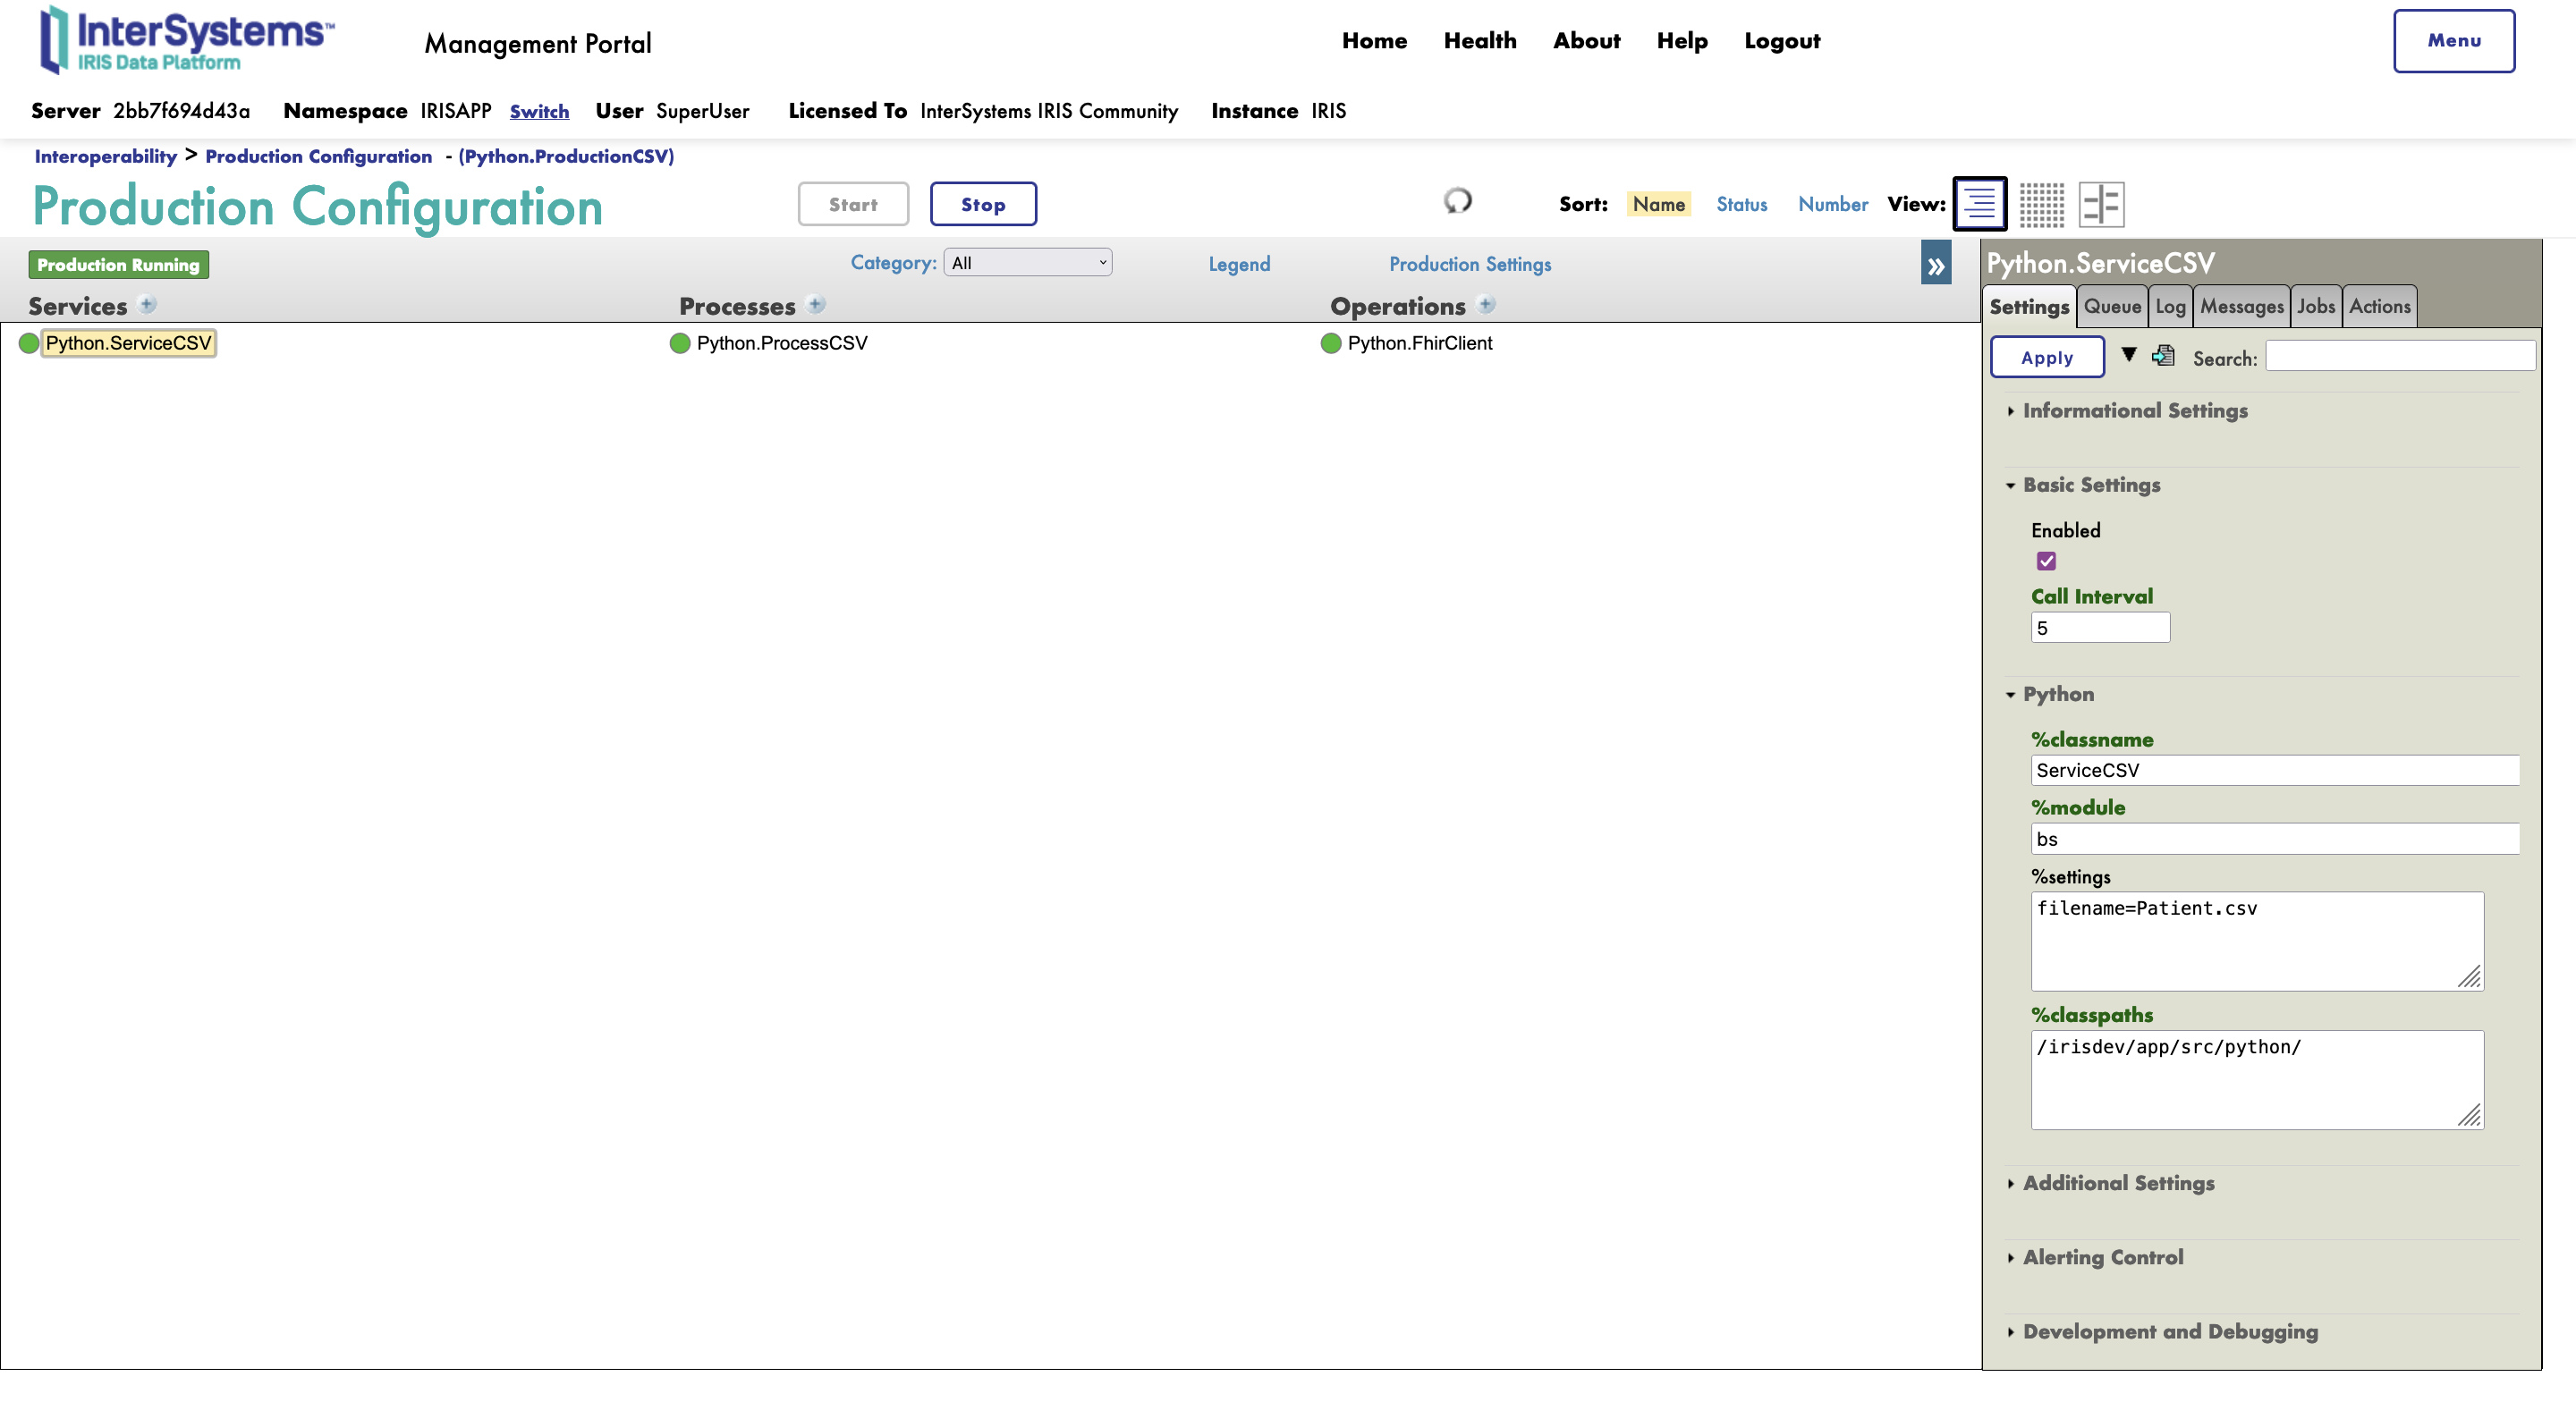
Now if you go into the management portal and change the setting of the ServiceCSV to add filename=Patient.csv you can just start the production and see your transformation unfold and you client send the information to the server.
Detailled steps to create a new transformation
If you are unsure of what to do or how to do it here is a step by step creation of a new transformation :
Create the file Patient.csv n the src/python/csv folder and fill it with:
family;given;system;value
FamilyName1;GivenName1;phone;555789675
FamilyName2;GivenName2;phone;023020202
Our CSV hold a family name, a given name and a phone number for two patients.
In src/python/obj.py write :
@dataclass
class BasePatient:
    family:str = None
    given:str = None
    system:str = None
    value:str = None
In src/python/msg.py write:
from obj import BasePatient
@dataclass
class PatientRequest(Message):
    resource:BasePatient = None
In src/python/bp.py write:
from msg import PatientRequest
from fhir.resources.patient import Patient
from fhir.resources.humanname import HumanName
In src/python/bp.py in the on_request function write:
if isinstance(request,PatientRequest): base_patient = request.resourcepatient = Patient() name = HumanName() name.family = base_patient.family name.given = [base_patient.given] patient.name = [name] telecom = ContactPoint() telecom.value = base_patient.value telecom.system = base_patient.system patient.telecom = [telecom] msg = FhirRequest() msg.resource = patient self.send_request_sync("Python.FhirClient", msg)
Now if you go into the management portal and change the setting of the ServiceCSV to add filename=Patient.csv you can just stop and restart the production and see your transformation unfold and you client send the information to the server.
7. What’s inside the repo
7.1. Dockerfile
The simplest dockerfile to start a Python container.
Use docker-compose up to build and reopen your file in the container to work inside of it.
7.2. .vscode/settings.json
Settings file.
7.3. .vscode/launch.json
Config file if you want to debug.
Made with
Version
1.0.017 Aug, 2022
Ideas portal
Category
Works with
InterSystems IRISInterSystems IRIS for HealthFirst published
17 Aug, 2022Last edited
17 Aug, 2022Last checked by moderator
27 Jun, 2023Works